

Hey there! I'm a supplier of hot presses, and I know that installing a hot press can seem like a daunting task. But don't worry, I'm here to walk you through the process step by step. By the end of this blog, you'll be confident enough to install your very own hot press like a pro.
Step 1: Preparation
Before you start the installation, you need to make sure you have everything you need. First, find a suitable location for your hot press. It should be a flat, stable surface with enough space around it for ventilation and easy access. You don't want it to be in a cramped corner where heat can build up and cause problems.
Next, gather all the tools you'll need. This usually includes a wrench set, screwdrivers (both flat - head and Phillips), and possibly a level to ensure the press is installed evenly. Also, check the hot press package to make sure you have all the parts. You don't want to start the installation only to find out you're missing a crucial component.
Step 2: Unpacking and Inspection
Carefully unpack the hot press. As you take out each part, inspect them for any signs of damage. Look for scratches, dents, or any other visible issues. If you find any damaged parts, contact me right away. We'll sort it out and get you the replacement parts as soon as possible.
Lay out all the parts in an organized way. This will make it easier for you to identify what goes where during the installation process. You can even refer to the installation manual that comes with the hot press to match the parts with the diagrams.
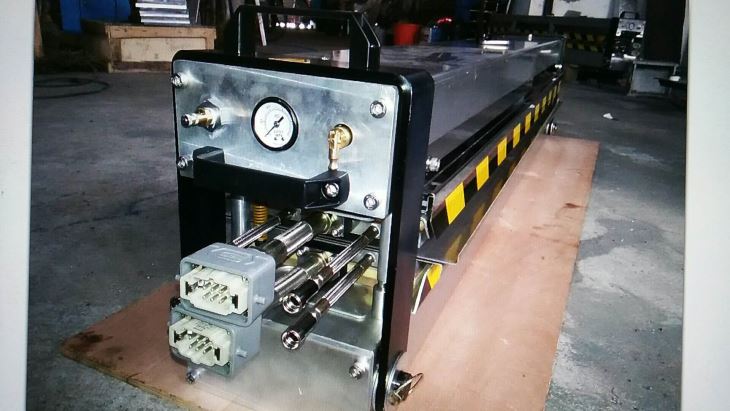

Step 3: Assembling the Frame
The frame is the foundation of the hot press, so it's important to assemble it correctly. Start by connecting the main frame pieces according to the instructions. Use the appropriate wrenches or screwdrivers to tighten the bolts and screws. Make sure the connections are secure, but don't over - tighten them as it could damage the parts.
Once the main frame is assembled, use a level to check if it's perfectly horizontal. Adjust the legs if necessary. A level frame is essential for the proper functioning of the hot press.
Step 4: Installing the Heating Elements
The heating elements are what make the hot press work. They need to be installed carefully. First, locate the designated spots on the press where the heating elements will go. These spots are usually marked in the installation manual.
Gently place the heating elements in their positions. Make sure the electrical connections are correct. If you're not sure about the wiring, it's better to consult an electrician. Incorrect wiring can not only damage the hot press but also pose a safety hazard.
Step 5: Connecting the Control Panel
The control panel is where you'll operate the hot press. Connect it to the main unit following the wiring diagram in the manual. The connections should be tight and secure. Once connected, you can test the control panel to make sure all the buttons and displays are working properly.
This is also a good time to set up the temperature and pressure settings according to your requirements. However, don't power on the hot press fully until the entire installation is complete.
Step 6: Testing and Calibration
Before you start using the hot press for real - world applications, it's crucial to test and calibrate it. Power on the hot press and let it heat up to the desired temperature. Check if the temperature is accurate using a separate thermometer. If there's a discrepancy, you may need to adjust the temperature settings on the control panel.
Also, test the pressure settings. You can use a pressure gauge to verify if the press is applying the correct amount of pressure. If needed, make the necessary adjustments to ensure the hot press is working at its optimal level.
Step 7: Safety Checks
Safety should always be your top priority. Check all the safety features of the hot press, such as emergency stop buttons and safety guards. Make sure they are in good working condition.
Inspect the electrical cords for any signs of wear or damage. If you find any issues, replace the cords immediately. Also, ensure that the hot press is properly grounded to prevent electrical shocks.
Additional Equipment and Accessories
As a hot press supplier, I also offer some additional equipment and accessories that can enhance the performance of your hot press. For example, if you're working with conveyor belts, you might be interested in our Conveyor Belt Air Cooling Splice Machine, Conveyor Belt Water Cooling Splice Machine, or Conveyor Belt Cutter. These tools can make your work more efficient and precise.
Conclusion
Installing a hot press may seem complicated at first, but if you follow these steps carefully, you'll have it up and running in no time. Remember, if you run into any problems during the installation process, don't hesitate to reach out to me. I'm here to support you every step of the way.
If you're interested in purchasing a hot press or any of the additional equipment I mentioned, I'd love to have a chat with you. We can discuss your specific needs, answer all your questions, and get you the best deal possible. Just drop me a line, and let's start this exciting journey together!
References
- Manufacturer's Installation Manual for Hot Press
- Industry Standards for Hot Press Installation and Safety